Recovery Mode in iOS 9 Explained
Our task at iOS 9 News is to simplify complicated things. And today, we are going to pick one topic that is worth your time. We are talking about iOS 9’s recovery mode…
It is not an uncommon term in the iOS world…
Yet it is often confused because some iPhone / iPad users are extremely worried and frustrated when their devices gets “stuck in recovery mode” while others intentionally want to “get into recovery mode.”
All these details are explained in this article. Let’s get started.
What’s a recovery mode? How does it work?
To understand recovery mode, it is important to talk about boot loader.
In simple words, a boot loader is a program with a single task: to load iOS onto the device after several tests. Think of it as a “teacher” strictly scanning through the exam papers.
This boot loader is always checking and looking for any errors. On iOS, Apple has given this boot loader a special name called “iBoot.”
iBoot is a boot loader.
Now, what if this iBoot doesn’t work? Or something goes wrong, say that your iOS installation has failed or the upgrade didn’t go as planned?
This is where the recovery mode is useful.
Whenever iOS installation or upgrade is damaged, your iPhone or iPad automatically goes into the recovery mode. This recovery mode loads iBoot. The current iOS firmware is checked and tested – if anything is wrong, you have given choices (explained later).
Recovery mode is developed for iOS software so that your devices cannot be damaged any further.
Remember: When something goes wrong with iOS firmware, you get the recovery mode.
What are its advantages?
One of the biggest benefit of recovery mode lies in its ability to control further damages.
Say that your iPhone or iPad is frozen, doesn’t respond, or looks like it has been completely bricked (or, as many says, the “iPhone is broken”)…
You can force the device to go into recovery mode. Then you can restore the iOS firmware.
Similarly, if iTunes doesn’t recognize your device, you can go into the recovery mode.
Or when you get a black screen with Apple logo, recovery mode is useful.
Users can get rid of “Connect to iTunes” screen when they put their devices into recovery mode.
If you have forgotten your passcode, you can go into recovery mode and safely restore the device to its factory settings (clean install). Everything starts from the recovery mode.
How to put iOS 9 devices into recovery mode?
Follow these steps:
- Make sure your iPhone / iPad is not connected to your computer and is fully charged (anything over 50% is good enough).
- Turn OFF your iOS device by pressing and holding the Sleep/Wake button (also called as power button). You will get a “slide to power off” message. Swipe to switch off the device.
- Take the USB cable (or lightning connector) and connect one end to your computer. Do not connect the other end to iPhone / iPad yet.
- Update the iTunes player. No need to launch it right now. Just make sure you have the latest version of iTunes running on your computer.
- Hold down the Home button on your device. And while doing so, connect the device to the USB cable. Yes, you need some ninja skills here.
Remember: Keep holding the Home button even after you have connected to the USB cable. At this point, you have iTunes running on your computer, an USB cable that connects your computer and the device.
- Your iPhone / iPad gets a recovery mode screen:

That’s it! You have successfully put your device into the recovery mode. What next? You have several options from here:
When you get this recovery mode screen (with blue or red iTunes icon in the middle and USB connector at the bottom), release the Home button.
Now, iTunes player will open automatically from your computer with a message saying:
“iTunes has detected an iPhone in recovery mode. You must restore this iPhone before it can be used with iTunes.”
Next, you will get another window:
“The software on iPhone needs to be restored to factory settings or updated” with two three buttons: Cancel, Update, Restore.
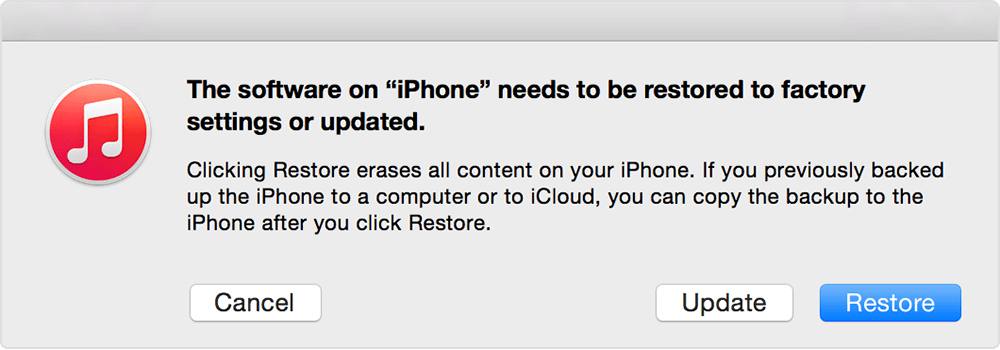
Tip: If you select “Restore” in recovery mode, all the apps, games, data, documents, photos will be permanently erased from your device. You can always do such restores and later use backup files to recover the data.
How to get out of recovery mode in iOS 9?
Sometimes your iOS 9 device becomes unresponsive and gets stuck in the recovery mode showing you the same iTunes icon and a cable pic on the screen.
In such cases, it is important to exit or get out of recovery mode by following any one of the method:
- Method 1:
Say that your iPhone / iPad shows recovery mode graphics, and the device is connected to the computer. In such cases, your iTunes player will pop up a message as mentioned earlier.
So if you get a pop up asking you to “update” or “restore” the device – do that. Because this will update your iOS device to its latest version (iOS 9 stable) automatically. That’s one way to get your iPhone / iPad out of the recovery mode.
- Method 2:
Say that you are “stuck” at the recovery mode graphics, and the device is not connect to the computer. In such cases, just connect the USB cable’s one end to your computer or laptop… and the other end of your iOS device.
Next, hold the home and sleep/wake button until the Apple logo appears.
Keep holding until the recovery graphic (iTunes and cable pic) is changed to another screen. By “another screen”, we mean the device boots up by showing you the white screen with Apple logo.
If that happens, you have successfully gotten out of the recovery mode in iOS 9.
Is Recovery Mode Safe? Do I lose data?
Your iPhone or iPad data is erased when you take action from your iTunes player.
Say that you have decided to restore the device that is stuck in recovery mode, then you lose all the data.
If you wish to remain in recovery mode, you lose no data – but then there’s no point in having a device that is stuck with recovery mode.
Deleted or removed data can always be recovered when you have a backup stored locally on your computer or on the iCloud.